DIY Chicken Run With Roof
Highlighted under: International Plates
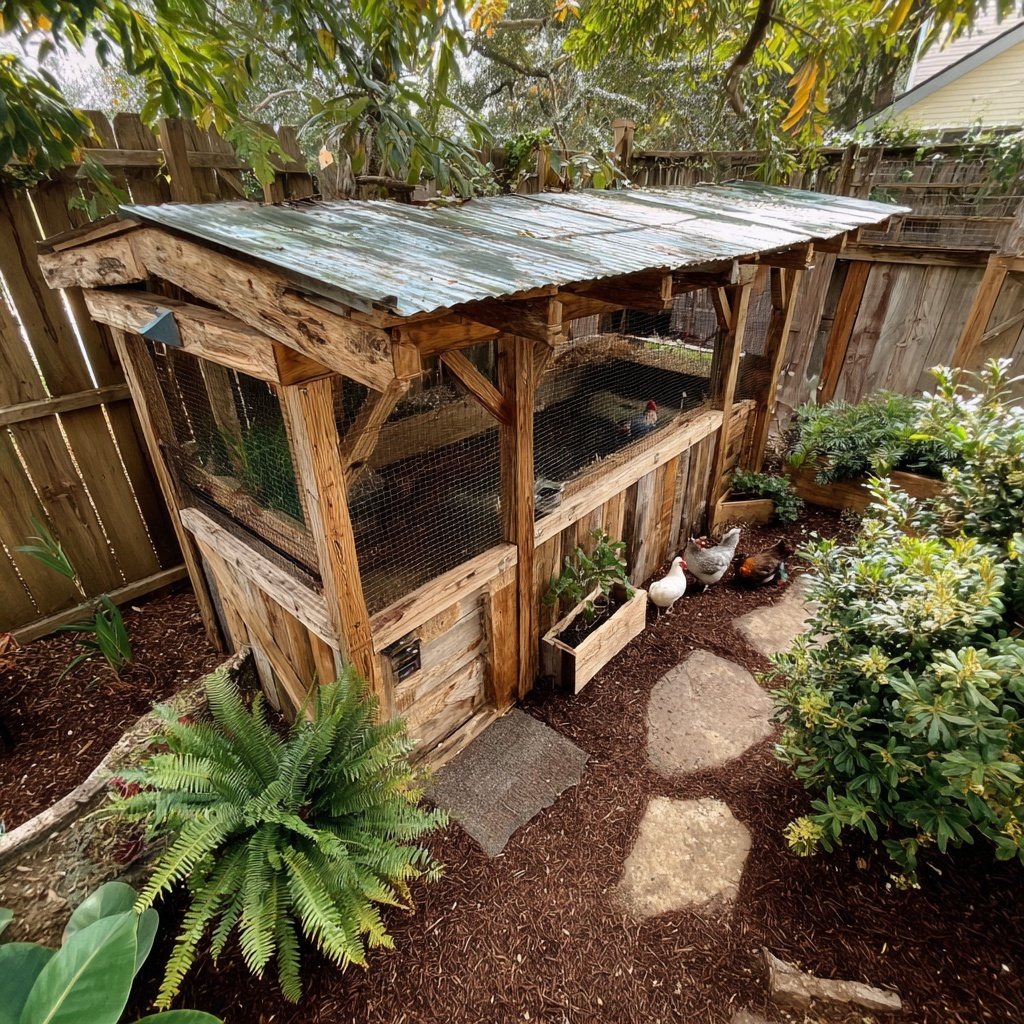
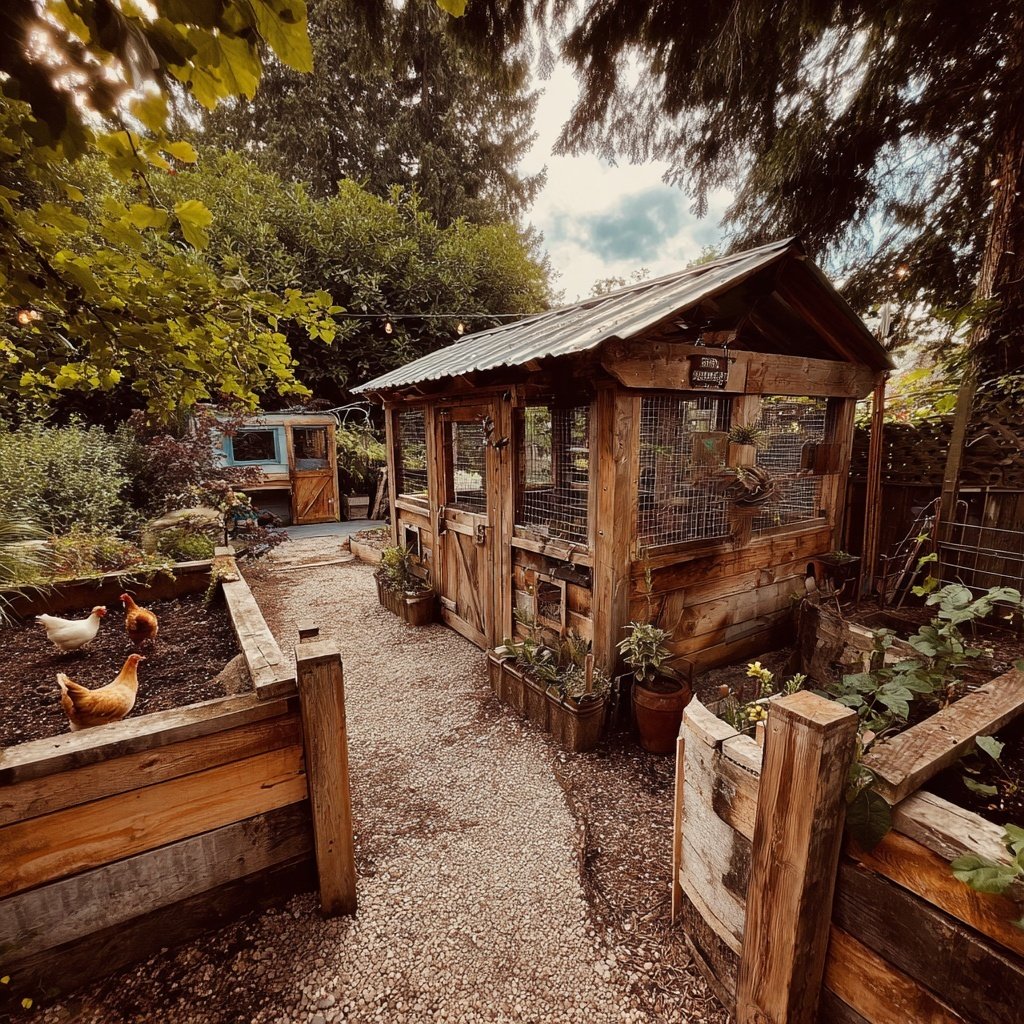
When I embarked on building this DIY chicken run with a roof, I knew I wanted a safe haven for my chickens while adding a bit of charm to my yard. I’m thrilled to share this project with you, from the framing to the roofing. What I love most about this design is that it combines functionality with aesthetics, keeping my chickens safe from predators and pesky weather while enhancing my garden. I'm excited to see how happy my feathered friends will be in their new home!
Building my chicken run with a roof was a labor of love! I knew I wanted a space that not only protected my chickens from predators but also provided shade during the hot summer months. I used sturdy materials for the frame and collected ideas from various inspirations online. The process taught me the importance of planning out the structure, ensuring everything was leveled and secure, which paid off in the end.
One detail I learned the hard way was to add an overhang to the roof—this prevents rain from pooling and keeps the run dry. It also gives a nice touch to the aesthetics! By the time I was finished, my feathered friends were eagerly exploring their new space, and I felt a great sense of satisfaction watching them enjoy their safe haven.
Why You'll Love This Chicken Run
- Provides shelter from predators and harsh weather
- Enhances the beauty of your garden
- Can be customized to fit your yard and style
Choosing the Right Materials
When constructing your DIY chicken run, the selection of materials is paramount to ensure durability and effectiveness. I recommend using robust wooden posts, such as 4x4 or 6x6, which can withstand weather elements and prevent easy access for predators. For the framing, 2x4 lumber provides an ample balance of strength and weight. Given the outdoor setting, consider using rot-resistant woods like cedar or treated lumber to enhance longevity.
Chicken wire is an essential component for enclosing your run. Look for a gauge that’s sturdy enough to prevent breaking but easy enough to work with. A 1-inch hexagonal pattern is generally effective against small predators, but if raccoons or larger threats are common in your area, a double layer might provide extra peace of mind. Additionally, always inspect your wire at the seams for gaps.
Roofing Options and Installation
The roof of your chicken run serves dual purposes: protecting your birds from harsh elements and adding structural integrity to the design. For roofing materials, metal sheets are highly recommended due to their durability and ability to efficiently shed rain. If you're aiming for a more budget-friendly option, consider heavy-duty tarps, ensuring they are securely fastened to prevent sagging or detaching in high winds.
When installing the roof, it’s crucial to maintain a slope for water runoff, which prevents pooling and potential leaks. As you secure your roofing choice, keep in mind that using screws rather than nails can enhance the stability of the installation. I’ve learned that using proper supports, like additional crossbeams, can make a significant difference in creating a sturdy structure.
Ingredients
Gather the following materials before starting your chicken run project:
Materials
- Wooden posts (4x4 or 6x6)
- Horizontal framing lumber (2x4)
- Chicken wire
- Roofing material (metal, tarp, or shingles)
- Hinges and latch for door
- Wood screws
- Paint or sealant (optional)
Make sure to assess the area where you’ll build to determine how much material you need.
Instructions
Follow these steps to construct your chicken run:
Plan Your Design
Sketch out the dimensions and design of your chicken run, noting where the roof will attach.
Prepare the Site
Select a flat area, clear any debris, and mark the corners of the run with posts.
Build the Frame
Erect the wooden posts and create a rectangular frame with horizontal lumber. Ensure it's sturdy.
Add Chicken Wire
Attach chicken wire along the sides of the frame, making sure it is secure to prevent escapes.
Install the Roof
Depending on your chosen roofing material, secure it to the top of the structure with proper supports.
Create the Access Door
Leave a space for a door, attach hinges, and secure with a latch for easy access.
Once constructed, you can add bedding, perches, and toys to keep your chickens entertained!
Pro Tips
- Always ensure ventilation in your chicken run, and regularly check for any potential gaps or weaknesses in the structure.
Essential Tools for Building
To tackle your chicken run project with confidence, you'll want to gather some essential tools. A power drill is invaluable for assembling the posts and attaching the roofing. If you don't have a power drill, a hand drill will suffice but may require more effort. A saw for cutting your lumber to size is also necessary; a miter saw can make precise cuts easier and faster.
Don't forget what I consider to be the unsung heroes of any construction: a good level and measuring tape. These tools help ensure your frame is straight and square, which is essential for the stability of the entire run. If possible, grab a helper to hold the posts while you secure them, as it makes the process much smoother and more efficient.
Maintenance and Care Tips
Once your chicken run is completed, maintenance will play a crucial role in its longevity. Regularly check for any signs of wear or damage, especially along the seams of the chicken wire where predators could exploit weaknesses. Maintaining the roof is also vital; clean off any leaves or debris that can trap moisture, as this can lead to premature deterioration of your materials.
As your chickens settle into their new home, plan for seasonal adjustments. During hot months, you might need to provide shade through additional coverings or planting nearby trees. In winter, consider insulating sections of the run or adding heat lamps to keep your birds comfortable. Regular cleaning of the run will also prevent health issues for your flock and keep the environment pleasant.
Questions About Recipes
→ How much space do chickens need in a run?
Chickens need at least 10 square feet per bird in an outdoor run.
→ What type of roof should I use?
You can use metal roofing, a waterproof tarp, or shingles depending on your climate.
→ How do I protect my chickens from predators?
Use sturdy materials and ensure the chicken wire is buried a few inches into the ground around the run.
→ Can I move the chicken run?
If built on skids or with movable designs, it can be relocated, which is beneficial for the grass.
DIY Chicken Run With Roof
Created by: Harriet Mason
Recipe Type: International Plates
Skill Level: Intermediate
Final Quantity: 1
What You'll Need
Materials
- Wooden posts (4x4 or 6x6)
- Horizontal framing lumber (2x4)
- Chicken wire
- Roofing material (metal, tarp, or shingles)
- Hinges and latch for door
- Wood screws
- Paint or sealant (optional)
How-To Steps
Sketch out the dimensions and design of your chicken run, noting where the roof will attach.
Select a flat area, clear any debris, and mark the corners of the run with posts.
Erect the wooden posts and create a rectangular frame with horizontal lumber. Ensure it's sturdy.
Attach chicken wire along the sides of the frame, making sure it is secure to prevent escapes.
Depending on your chosen roofing material, secure it to the top of the structure with proper supports.
Leave a space for a door, attach hinges, and secure with a latch for easy access.
Extra Tips
- Always ensure ventilation in your chicken run, and regularly check for any potential gaps or weaknesses in the structure.
Nutritional Breakdown (Per Serving)
- Calories: 0 kcal
- Total Fat: 0g
- Saturated Fat: 0g
- Cholesterol: 0mg
- Sodium: 0mg
- Total Carbohydrates: 0g
- Dietary Fiber: 0g
- Sugars: 0g
- Protein: 0g